Wednesday, July 4, 2012

The Christmas Lips Step-by-step Tutorial

The Christmas Lips Step-by-step Tutorial
Christmas Lips Tutorial posted by beautys watch


Steps :
  1. Prep lips with a moisturising lip balm that has minimal slip.
  2. Conceal lips with foundation using a sponge.
  3. Fill your entire lips with a deep red lip pencil using light strokes.
  4. Fill the outer edges of your lip with a deep red hydrating lipstick using a lip brush.
  5. Apply red metallic pigment to the centre of both top and bottom lips & blend well.
  6. Press gold glitter to the centre of the bottom lip only & blend.
  7. Apply a tiny amount of gold shimmer to the cupids bow to add dimension & create volume.

Source : Christmas Lips Tutorial

Tutorials You Should also see :

how to do the Popsicle Tinted Lips Tutorial

how to do a Popsicle Tinted Lips step-by-step Tutorial
Popsicle Tinted Lips Posted on beautys watch


Steps :
  1. Prep lips with a lightweight lip balm.
  2. Apply a lip stain to the inner semi-circle area of the bottom lip.
  3. Repeat on the upper lip, changing the direction of the wand you’re applying outwards.
  4. Use a lip brush to apply your favourite nude lipstick around the edges of the popsicle tint.
  5. Press your lips together to blend the popsicle tint nude lipstick- gently.

Source : Popsicle tinted lips tutorial

Tutorials You Should also see :


Tuesday, July 3, 2012

Hippie hair style tutorial

if you are a mortal like me then you don't have a lot of time to do your hair . so this is a Hairstyles That Take Less Than 10 Minutes.

how to do a Hippie hair style with step by step tutorial
Hippie hair style posted on treasures and travels by Kalos


Steps :
  1. Grab a chunk from underneath the top layers of your hair and braid it.
  2. Warp the braid around your forehead and pin it in place. and that's all you gotta do.

Source : summer hair // two styles

Tutorials You Should also see :

Monday, July 2, 2012

Quick an Simple Summer Hair Style using a headband step-by-step tutorial

If you're struggling through the awkward phase of growing your bangs . then this hair style is the perfect solution to your problem.

Quick an Easy Summer Hair using a headband tutorial
Summer Hair Style Posted on treasures and travels by Kalos


Steps :
  1. First put the headband in the the crown of your head.
  2. Then tuck all the annoying bangs in place by Twisting the hair around the headband. and that's all you gotta do.

Source : summer hair // two styles

Tutorials You Should also see :

Quick and Easy way to style a braided crown step-by-step hair tutorial

Quick and Easy way to style a braided crown step-by-step hair tutorial
Quick and Easy braided crown Posted on treasures and travels by kalos


Steps :
  1. Divide hair into 4 sections, seperating the front from the back on either side.
  2. Braid each section starting close to the root, 4 braids total, and look like a crazy person (or me at age 12)
  3. Pull the end of one braid to the beginning of the next braid, going in the same direction all around the head
  4. Bobby pin the end of each braid into the start of the braid beside it. Be sure to hide those bobby pins so that it looks like one braid all the way around!!

To see the full tutorial withe pictures then go to : tutorial // braided crown

Tutorials You Should also see :

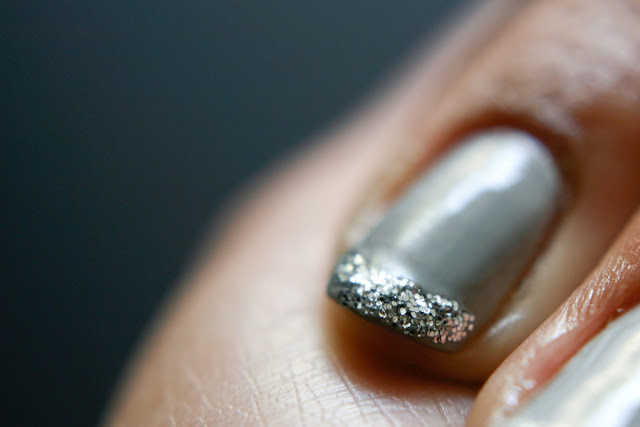
How to do a Glitter French Manicure step-by-step tutorial

How to do a Glitter French Manicure step-by-step tutorial
Glitter French Manicure Posted on une-deuxsenses


Steps :
  1. Apply one layer of base coat, Let it dry.
  2. Then apply two layers of color, and Let it dry completely.
  3. Use the striping brush to paint on the 'manicured tip'.
  4. Finish with a top coat and enjoy! .

Source : Manicure Mondays: Glitter French

Tutorials You Should also see :

Sunday, July 1, 2012

Quick and Simple Half Moon manicure step-by-step

Quick and Simple Half Moon manicure step-by-step
Half Moon manicure posted by une-deuxsenses


Steps :
  1. First apply a base coat, and let it dry .
  2. Then apply the first color, and let dry completely.
  3. Then Apply a 'hole protector' to mimic the half moon shape.
  4. use a rosewood stick to secure edges completely.
  5. then apply the second color 'one coat should be sufficient'.
  6. Remove the 'hole protector' before color dries.
  7. Let dry then apply Top coat.

Source : Manicure Mondays: Half Moon

Tutorials You Should also see :