|
| Wrapped Around Half Updo Tutorial |
How To Style :
- Use a flat iron or large curling iron to softly curl the ends of your hair.
- Starting at the crown, push up a small section of hair until it’s the size that you want and pin it in place. Pin a few more pieces like this all through the crown to create a nice shape.
- As you move down the sides, wrap the hair on the left over to the right, and vice versa, pinning each side wrapped across the other side. Take 2-3 sections for each side.
Tutorials You Should also see :
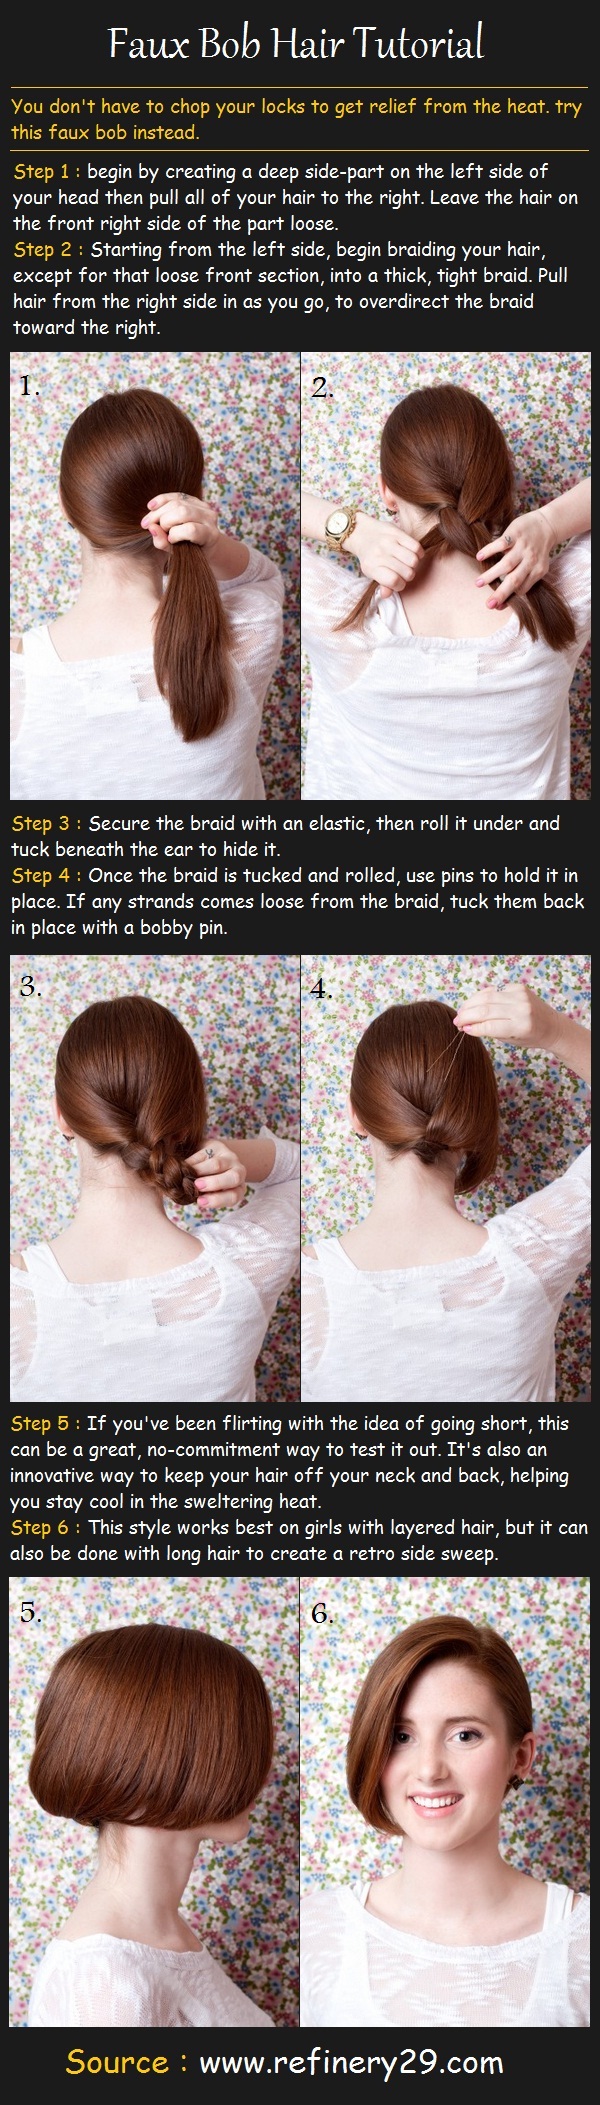
- Faux Bob Hair Tutorial
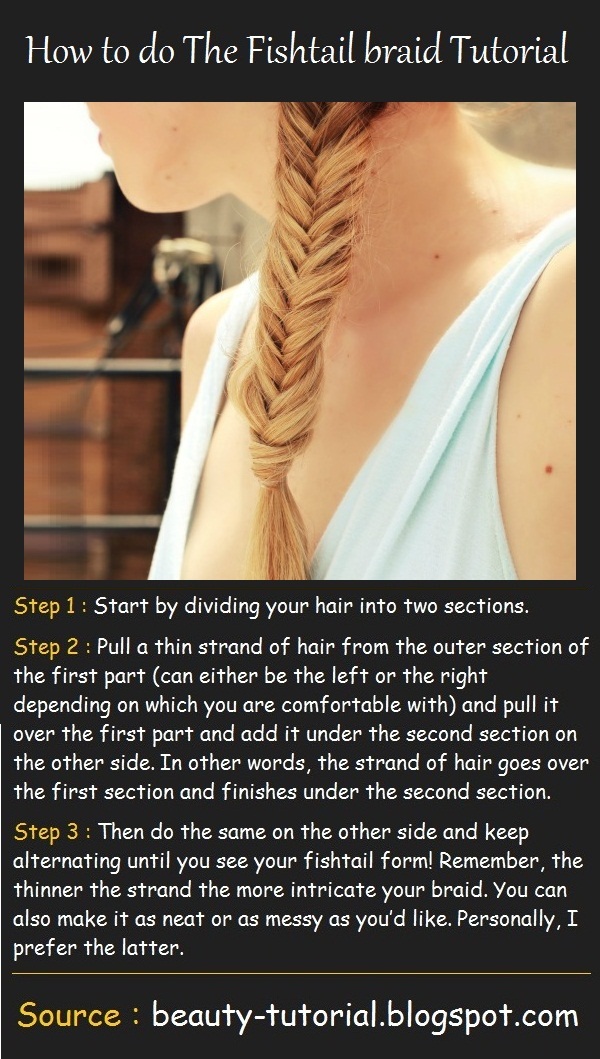
- How to do The Fishtail Braid Tutorial
- Ponytail With Twists Hair Tutorial
- Simple Fishtail Braid Tutorial
- Softly Pinned Half Updo Tutorial